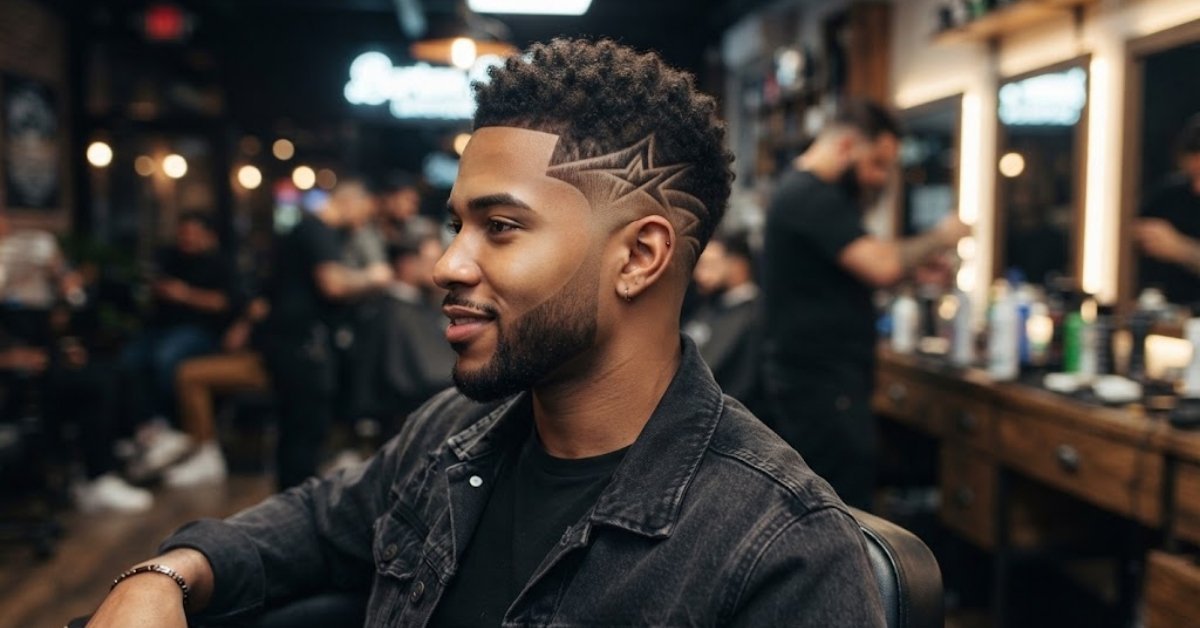
A burst fade design turns a regular haircut into a real style statement. The fade curves around the ear like a sunburst, and a barber shaves a pattern into that curved section, a line, a bolt, a star, or something more detailed.
This guide breaks down what a burst fade design actually is, the best places to put it, the most requested design ideas for 2026, and how to keep it looking sharp between barber visits. Whether you want something subtle for the office or something bold enough to turn heads, you will find a design and placement that fits.
What Is a Burst Fade Design
A burst fade design is a burst fade (a fade that curves around the ear rather than running in a straight line down the side) combined with a shaved pattern cut into the faded skin. The pattern sits in the short, close-cropped part of the fade, usually right where the curve is tightest.
Barbers create the design using clippers with a detail trimmer or a T-liner, sometimes finishing the edges with a straight razor for extra sharpness. The result is a haircut that keeps the natural, rounded look of a burst fade but adds a piece of personal style on top of it.
Two things make a burst fade design work well:
- A clean fade underneath. If the blend between guard lengths is choppy, the design will look messy no matter how well it is cut.
- A design that matches the hair length around it. Thicker or longer hair around the design can swallow fine details, so simpler shapes usually age better.
Burst Fade With Design vs Regular Burst Fade
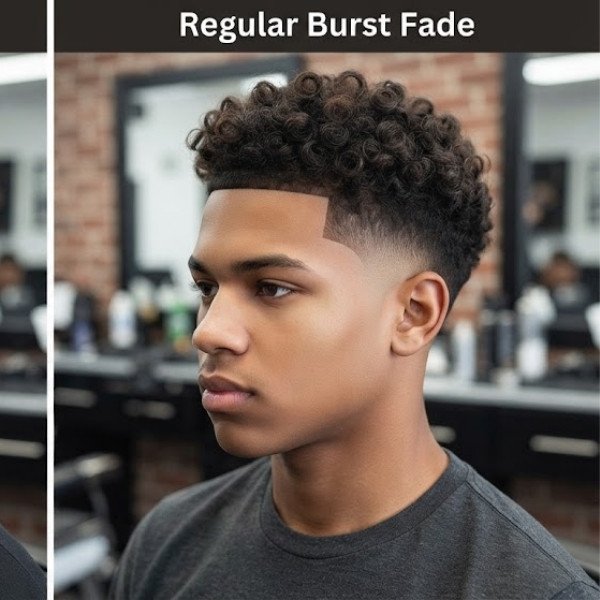
A regular burst fade is already a distinct look on its own. The fade wraps around the ear instead of cutting straight across the side, which gives the haircut a softer, more rounded transition than a standard skin fade.
A burst fade with design takes that same base cut and adds a shaved detail into it. Here is how the two compare:
| Feature | Regular Burst Fade | Burst Fade With Design |
| Look | Clean, understated | Bold, detailed |
| Barber time | Shorter | Longer, extra detail work |
| Upkeep | Every 2 to 4 weeks | Every 1 to 3 weeks to keep lines sharp |
| Best for | Work, school, first-time fades | Statement looks, events, personal style |
| Skill needed | Standard fade skill | Fade skill plus freehand or stencil design work |
If you are getting a burst fade for the first time, starting with the regular version lets you judge how the shape suits your head before committing to a design. If you already know you like the burst shape, adding one line or pattern is a low-risk way to level it up.
Where Should the Design Go on a Burst Fade
Placement changes two things: how visible the design is day to day, and how quickly it grows out and loses its edge. A design placed where hair grows fastest will need more frequent touch-ups than one placed in a slower-growing spot.
The three most common placement zones are:
- Above the ear, on the widest part of the burst curve. This is the most visible spot from the front and side, which makes it the most popular choice.
- Behind the ear, where the fade tucks in tighter. This is more subtle and often preferred for workplaces with grooming policies.
- Nape or V area, at the back of the neck. This spot is bolder and pairs especially well with mullets or longer back sections.
Before picking a spot, it is worth checking any dress code or school policy on visible haircut designs, since some workplaces restrict shaved patterns regardless of size.
Behind the Ear Burst Fade Design
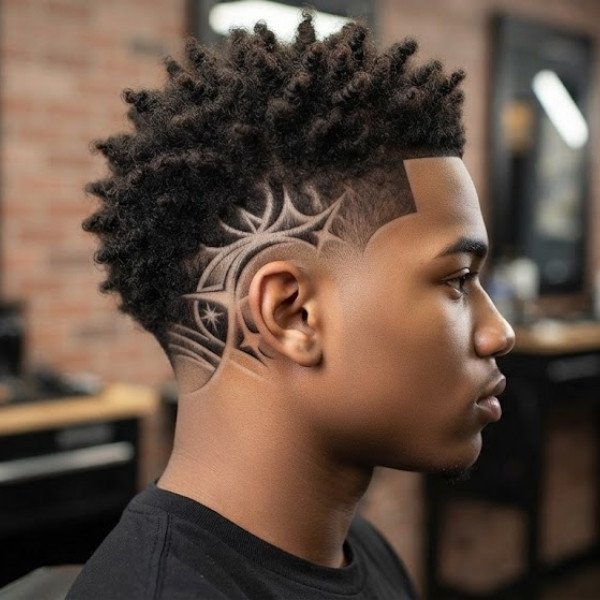
Placing the design behind the ear keeps it out of direct view when looking at someone head-on, but it still shows when they turn their head or when the hair is pushed back. This makes it a good middle ground for anyone who wants a design but also needs a more conservative look for work or school.
Because this area sits closer to the neckline, hair here tends to grow in a slightly different direction than at the temple, so barbers often use a smaller trimmer size to keep the lines crisp. This placement also tends to hold its shape a little longer than the nape, since it is not brushed or rubbed against a collar as much.
Nape and V Area Design
The nape and V area sit at the base of the skull, right where a lot of burst fades taper into a point or curve into a V shape. A design here reads as bolder because it sits close to hair that is often left longer on top or at the back, creating strong contrast.
This placement works especially well with mullets, longer burst fades, or any style where the back is left thicker. The trade-off is that neck hair grows faster than temple hair for a lot of people, so a nape design usually needs the most frequent maintenance of the three placements.
Best Burst Fade Design Ideas
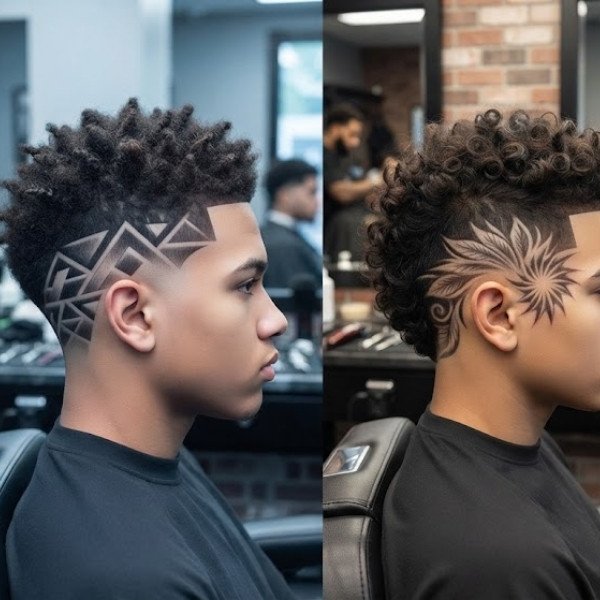
Below are the design shapes barbers get asked for most heading into 2026, ranked from simplest to most detailed. Simpler designs are easier to maintain and less noticeable as they grow out, while detailed designs make more of a statement but need tighter upkeep.
Burst Fade Line Design
A single shaved line is the most requested burst fade design, and for good reason. It works on almost any hair type, takes only a couple of minutes to add, and still gives the haircut a sharper, more finished look. Some people add a second parallel line for a bit more detail without going overboard.
Lines work best on straight to wavy hair, where the shave shows clean contrast. On very curly or coily hair, a single line can be harder to spot unless the top is kept shorter.
Burst Fade Zigzag Design
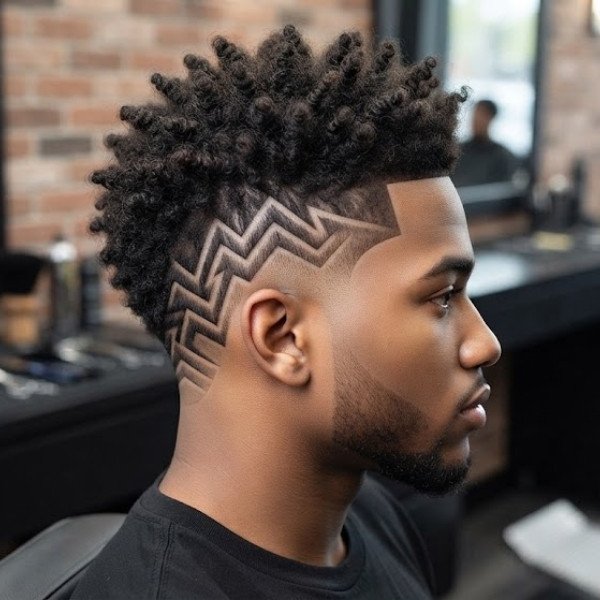
A zigzag design adds movement to the fade and stands out more than a straight line without being as involved as a full shape. It usually sits above the ear, following the curve of the burst so the zigzag bends naturally with the head shape.
This design needs a fairly steady hand from the barber, since uneven zigzag points are noticeable. It is a good next step for anyone who has tried a line design and wants something with a bit more edge.
Burst Fade Lightning Bolt Design
The lightning bolt is one of the boldest and most recognizable burst fade designs. It works well as a single accent piece above or behind the ear and tends to photograph well because of its sharp angles.
Because the bolt has several angled points, it grows out faster-looking than a single line, so anyone choosing this design should plan on touch-ups roughly every one to two weeks if they want it to stay crisp.
Burst Fade Heart Design
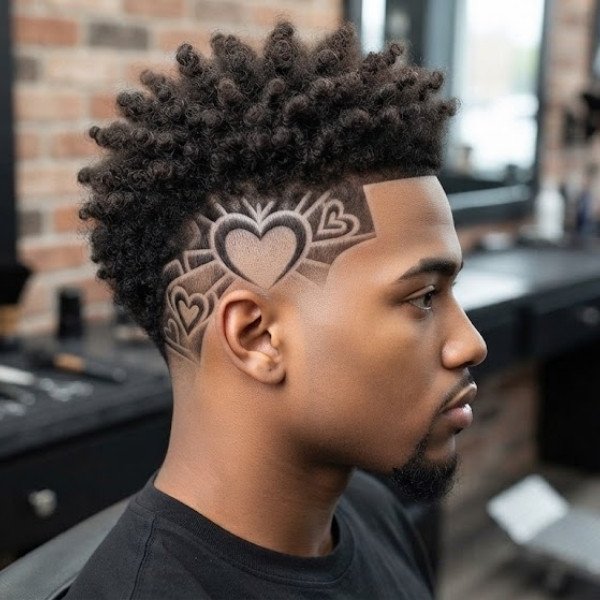
A heart design is a popular request around events, holidays, or just as a personal style choice. It is more detailed than a line or zigzag, so it takes a bit longer in the chair and needs a barber comfortable with curved freehand shapes.
This design tends to show up most on kids’ and teens’ cuts, though plenty of adults request it too. Placement above the ear gives it the most visibility.
Burst Fade Star Design
Stars are a classic design choice that works at almost any size, from a small single star tucked behind the ear to a larger star as the main feature above it. Multiple small stars scattered through the fade are also a common variation.
Star shapes hold their form reasonably well as hair grows back in, since the points blur gradually rather than disappearing all at once.
Burst Fade Geometric Design and Negative Space
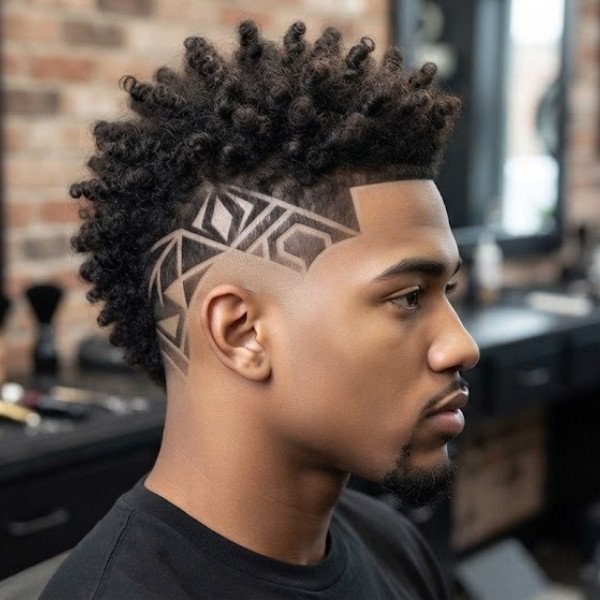
Geometric designs use straight-edged shapes such as triangles, diamonds, or blocked patterns, sometimes combined with negative space, where the surrounding hair is left slightly longer so the shaved shape appears to float against it. This style leans more modern and works particularly well on thicker hair, which holds the contrast around the shaved sections.
Negative space designs take more planning than a simple shave-and-go line, so it is worth booking extra time with your barber and bringing a reference photo.
Burst Fade With V Design
A V design cut into the nape, paired with a burst fade on the sides, is one of the most requested combinations for 2026. The V shape at the back gives the haircut a defined point at the neckline, while the burst curve keeps the sides soft and rounded.
This combination looks especially clean on darker hair, where the V’s edges show strong contrast against the skin.
Low vs Mid vs High Burst Fade Design
The height of the fade changes how bold the design looks and how often it needs upkeep. Higher fades show more skin and more of the design, but they also grow out and lose sharpness faster than lower fades.
Low Burst Fade Design
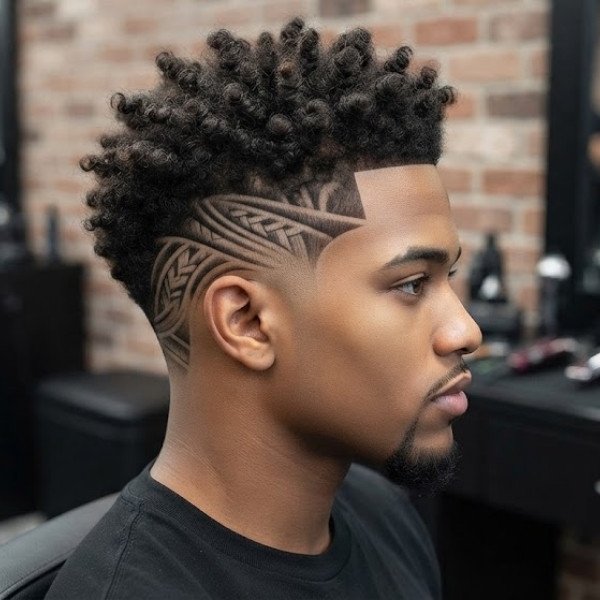
A low burst fade keeps the fade close to the ear and low on the head, which makes it the most versatile option for workplaces, school, and anyone easing into their first design. Because the fade sits lower, the design has less surface area to sit in, so simpler shapes like a single line usually work best here.
Mid Burst Fade Design
A mid burst fade sits between the ear and the temple, giving the design more room to breathe without going full high-contrast. This is often described as the balanced choice, since it is visible enough to notice but not as demanding to maintain as a high burst.
High Burst Fade Design
A high burst fade climbs well above the ear, closer to the temple, and gives the design the most visibility of the three heights. This is the boldest option and suits people who want their design to be a main feature of the haircut rather than an accent. High fades also show regrowth fastest, so plan for touch-ups roughly every one to two weeks to keep the design defined.
Burst Fade Design for Different Hair Types
Hair type has a bigger impact on how a burst fade design looks than most people expect. The same design can look completely different depending on whether the hair is straight, curly, thick, or fine.
Burst Fade Design on Straight Hair
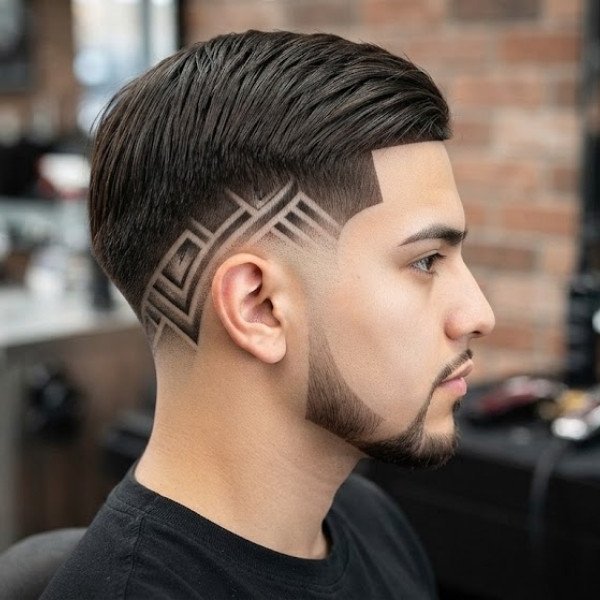
Straight hair shows the sharpest, cleanest lines because there is no natural texture to soften the edges of the design. Simple line, zigzag, and geometric designs all read clearly on straight hair, which is why barbers often recommend this hair type for a first-time design.
Burst Fade Design on Curly Hair
Curly and coily hair adds volume around the fade, which can hide small or subtle designs once the hair grows even slightly. Bolder shapes like stars, hearts, or thicker lines tend to hold up better on curly hair, since they have enough size to stay visible through the texture.
Keeping the top slightly shorter also helps the design stay in view longer between cuts, since less length falls forward over the fade.
Burst Fade Design for Thick Hair vs Thin Hair
Thick hair holds contrast well around a design, since the density on either side of the shaved section makes the pattern pop. Thinner hair shows the scalp more easily, which can actually make fine-line designs look sharper, though it also means any uneven blending is more noticeable.
For thin hair, barbers often recommend keeping the surrounding fade slightly softer so the design does not look harsh against thinner coverage.
Burst Fade Design With Popular Top Styles
A burst fade design does not exist on its own, it pairs with whatever is happening on top. Certain top styles complement specific designs better than others.
Burst Fade Mohawk Design
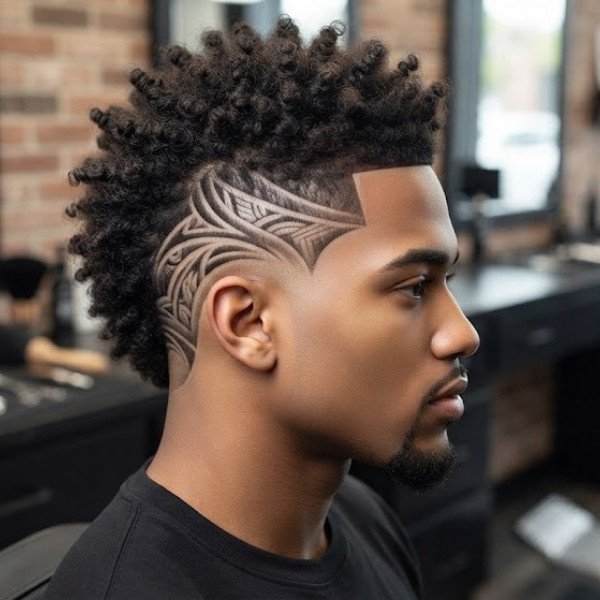
Pairing a burst fade with a mohawk creates strong contrast between the shaved sides and the raised strip on top, which makes any design on the fade stand out even more. A single bold shape, like a lightning bolt or star, tends to look best here since the mohawk already draws a lot of visual attention.
Burst Fade Mullet Design
The burst fade mullet keeps length at the back while fading the sides and around the ears, and it pairs especially well with a nape or V design since both features sit in the same general area. This combination has grown fastest in popularity heading into 2026, particularly with a design added at the point where the fade meets the longer back section.
Burst Fade Textured Crop or Fringe Design
A textured crop or fringe on top, paired with a burst fade design, gives a more casual, everyday look compared to a mohawk or mullet pairing. Since the top is shorter and more textured, a design placed above or behind the ear stays visible without needing the top styled a particular way each day.
What to Tell Your Barber
Miscommunication is the most common reason a burst fade design does not turn out the way someone pictured it. Bringing a clear reference photo and a few specific details makes a big difference.
Useful things to mention before the cut starts:
- The exact design you want (name it or show a photo, do not just describe it verbally)
- Where you want it placed (above ear, behind ear, or nape)
- Whether you want it bold and large or small and subtle
- Any hair length you want kept on top
- Whether this is your first time getting a design (so the barber can plan for growth and future touch-ups)
Simple Guard and Blend Notes
For the fade itself, most barbers start with a 0 or 0.5 guard at the skin and blend upward through 1, 2, and 3 guards depending on how gradual you want the transition. If you want the design to stay visible longer, ask your barber to keep the guard length closest to the design slightly shorter than usual, since shorter hair around a design keeps it sharper for longer.
It also helps to ask whether they use a stencil for detailed shapes like stars or geometric patterns, since freehand and stencil work can produce noticeably different results on complex designs.
Burst Fade Design Maintenance
A design only looks good as long as the fade underneath it stays sharp. Once the hair around the design starts growing back in, the edges blur and the shape becomes harder to make out.
How Often to Redo the Design
Most burst fade designs need a touch-up every one to three weeks, depending on the design’s complexity and how fast your hair grows.
- Simple line designs: every 2 to 3 weeks
- Zigzag, star, or heart designs: every 1 to 2 weeks
- Lightning bolt or detailed geometric designs: every 1 to 2 weeks, since angled points blur faster than straight lines
High fades and nape or V placements tend to need touch-ups on the shorter end of these ranges, since hair grows back faster in those zones.
Aftercare Tips
Keeping the design sharp between barber visits comes down to a few habits:
- Avoid rubbing or scratching the design area, especially right after the cut when skin can be slightly sensitive
- Use a light, alcohol-free moisturizer on the faded skin to prevent dryness and flaking
- Keep the surrounding hair trimmed at home with a detail trimmer if you notice regrowth starting to blur the edges, but leave full reshaping to your barber
- Wash with a gentle shampoo a few times a week rather than daily, since over-washing can dry out the scalp around the design
- Protect the area from excessive sun exposure if the design sits on skin that is normally covered by hair, since fresh shaved skin can be more sensitive to sunburn
Burst Fade Design Mistakes to Avoid
A few avoidable mistakes come up again and again with burst fade designs:
- Choosing a design that is too small for your hair type. Fine lines disappear quickly on curly or thick hair.
- Skipping the reference photo. Verbal descriptions of shapes like “a cool geometric thing” leave too much room for misinterpretation.
- Placing a detailed design somewhere it grows out fast. A detailed nape design might look great for three days and blurry by day ten.
- Ignoring workplace or school policy. Some environments restrict shaved patterns regardless of size, so it is worth checking first.
- Waiting too long between touch-ups. Once the edges of a design blur, it usually needs a full redo rather than a simple clean-up.
- Going straight to a bold design on a first fade. Starting with something simple, like a single line, makes it easier to judge how you feel about having a design at all.
Conclusion
A burst fade design is one of the easiest ways to turn a solid haircut into something more personal, whether that means a single clean line above the ear or a full geometric pattern at the nape. The key to getting it right comes down to three things: a clean fade underneath, a design that matches your hair type and length, and a maintenance routine that keeps the shape sharp.
Start simple if you are new to the look, bring a clear reference to your barber, and be honest about how much upkeep you are willing to commit to. Get those basics right, and a burst fade design will stay one of the sharpest, most versatile haircuts you can ask for in 2026.
FAQs
What is a burst fade design? It is a burst fade (a curved fade around the ear) with a shaved pattern, like a line, star, or zigzag, cut into the faded section.
Where does a burst fade design usually go? Most commonly above or behind the ear, though nape and V-area placements are popular for bolder looks.
How often do you need to redo a burst fade design? Simple designs need a touch-up every 2 to 3 weeks, while detailed shapes usually need attention every 1 to 2 weeks.
Does a burst fade design work on curly hair? Yes, but bolder, larger shapes hold up better than thin lines, since curls can hide small details as hair grows.
Can I get a burst fade design for work or school? It depends on the dress code. Subtle placements like behind the ear or a single small line are usually the safest choice.
What should I bring to my barber for a burst fade design? A clear reference photo, your preferred placement, and how bold or subtle you want the design to be.